
Hey guys!
So here lately I've gone on a "let's clean out everything in my closet" binge and surprisingly enough, that included my makeup. I pretty much got rid of about 50% of my makeup (maybe a little less, but it was a lot). While going through my makeup, one thing lead to another and I started swatching things and eventually realized I was in the mood to do a full face with some rediscovered products I found in the black hole area of my makeup drawers. I wanted to use some of my older products. but also incorporate a few new things. I decided to create a look around the Stila Magnificent Metals Foil Finish Eyeshadow in Vintage Black Gold. I've heard a lot of mixed reviews on these pigments and I wanted to share with you a little of what I've learned about the application process. I will explain more in detail in the tutorial below. I hope you all enjoy this look and get inspired!


Apply your favorite primer first. I used MAC's Paint Pot in Soft Ochre. Next, apply a transition shade a few shades darker than your natural skin tone. I used Naked from the original UD Naked palette.
Next, take a dark black shade and create a sideways V shade in the outer corner of your lid. This will add depth to the look when you later apply the glitter pigment.

Then, apply a sticky base on the lid from the inner corner to about half way through the black V you created. The glitter should overlap the black slightly. Only apply this sticky base where you want the glitter. If you go up too high (anywhere above your crease) it will look messy and be harder to blend later.

This glittery pigment is very unique and nothing like anything else I have in my collection. It is slightly squishy and bouncy to the touch kind of like a cream but isn't. It's strange. It comes with a liquid eye primer you are supposed to drop into a small pan and mix with the glitter pigment, then apply it with a synthetic brush across your lid. I honestly don't like the results I get by doing it that way so I came up with my own way to use it. I simply dip my ring finger into the glitter pigment and apply it directly onto my lid. No liquid primer and no mixing crazy, nonsense stuff together. By applying it with your finger, you will get the most color payoff and your lids will look AWESOME!

Now that you've applied the glitter, take a slightly darker transition shade and rock it back and forth into your socket/crease. This will help blend the edges of the glitter and darken the look a tad.

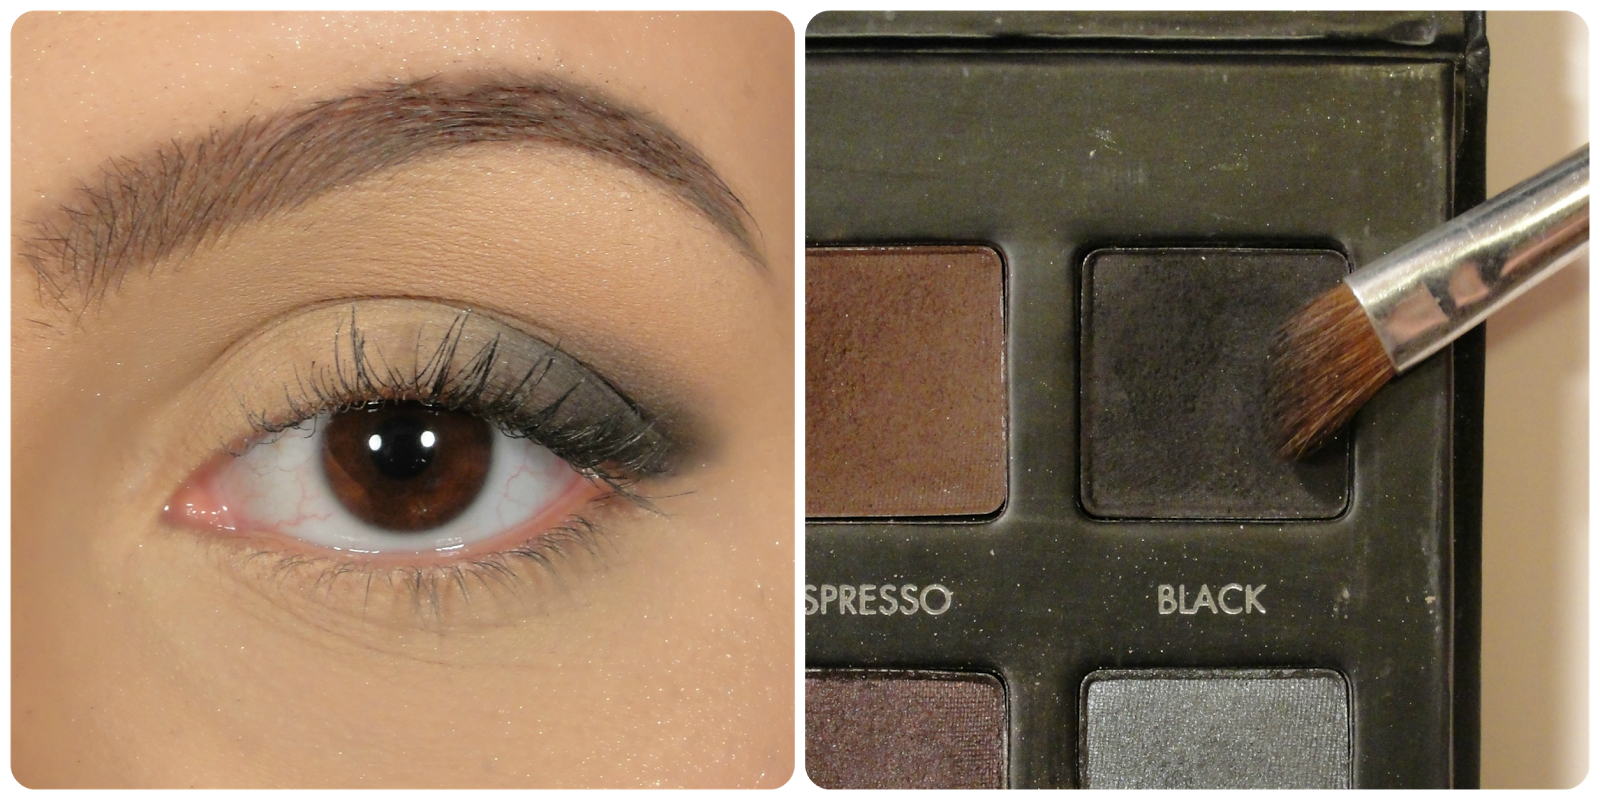
Let's not forget the lower lash line. I ran Sable all the way across the lower lash line, Espresso across 2/3 of the lower lash line and finally Black on the outer 1/3 of the lower lash line and blended.

For highlight, I kept it simple by going with a matte cream color in the inner corner of the eye and underneath the brow. Notice how I am only using matte eyeshadows (other than the obvious glitter we applied). This draws the attention to the glittery goodness on the mobile lid and doesn't overwhelm the look with too much shimmer and glitter.

Last, finish with a coat of mascara and some wispy lashes. I love these by Ardell.

And here's the final look.


I hope you enjoyed this look! Let me know what you think in the comments below :) Also, if you recreate this look, tag me in your picture on Instagram. I'd love to see what you come up with!
Product List:
Hourglass Veil Mineral Primer SPF 15
Laura Mercer Silk Creme Foudation in Beige Ivory
Chanel Soleil Tan De Chanel Bronze Universel
ELF Studio HD Blush in Headliner
Maybelline Instant Age Rewind Concealer in Neutralizer
Covergirl Ready, Set, Gorgeous Powder Foundation in 105/110
Tarte Amazonian Clay Blush in Glisten
Benefit Hoola Bronzer
Anastasia Beverly Hills Dip Brow Pomade in Dark Brown
MAC Paint Pot in Soft Ochre
Urban Decay Naked Palette
Lorac Pro Palette
LA Splash Splash Proof Sealer Eyeshadow Base
L'Oreal Voluminous Carbon Black Mascara
Ardell Demi's in 120 Black
Nivea Lip Butter in Vanilla and Macadamia Kiss
Revlon Super Lustrous Lipstick in 415 Pink in the Afternoon
Earrings are from Old Navy.


This looks great! I have wanted a magnificent metal for so long but I haven't taken the plunge with that price! It's a little crazy but it may be worth it. I love this look!
ReplyDeletelove this look ♥
ReplyDeleteLovely tutorial, thanks for sharing!
ReplyDeletexo,
~Pauline @Clinique Philippines
The contents of the blogger are really embarrassed.I want to exchange lots of information. Please visit once. Thank you.
ReplyDelete바둑이사이트
Removing your makeup is essential in order to avoid clogging pores and breakouts. Not only that, it will also help you sleep more soundly at night. On top of all this, it's also important to consider the type of cleanser you use. Removing makeup is not just about getting it off—it's also about maintaining healthy skin. The first step of removing makeup is to cleanse your skin and remove any impurities and makeup by facial wash with salicylic acid that may be clogging your pores or making you break out.
ReplyDeleteI appreciate how you seamlessly blend facts with your personal touch. Your authenticity shines through in every post.
ReplyDeleteMarble Installation in UAQ